How To Photograph Sunrise From Kilimanjaro Summit
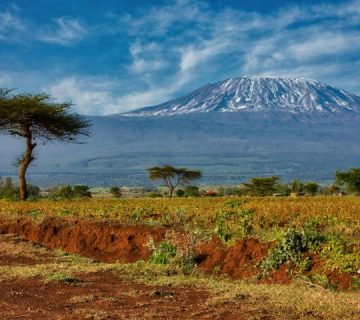
Capturing the sunrise from atop Mount Kilimanjaro, the highest peak in Africa, is not only a photographer’s dream but also a sublime experience that tugs at the core of our adventurous spirits. Each ray of light dancing over the horizon brings a unique story, especially when viewed from the summit of this majestic mountain. The Kilimanjaro Centre for Trekking and Ecotourism (KCTE) is your expert guide in making this awe-inspiring experience a reality, not just by leading you safely up the mountain but also by helping you capture these breathtaking moments through your lens. This blog post is designed to guide you on how to photograph the sunrise from Kilimanjaro’s summit—a spectacle that is as mesmerizing as it is transformative.
Preparing for Your Journey
Choose the Right Gear
To ensure you capture the perfect sunrise, you need the right photography equipment. A DSLR or a mirrorless camera with manual settings will give you control over the exposure. Lenses with various focal lengths can be advantageous, though a good quality wide-angle lens is ideal for capturing expansive landscapes and the vast horizon. Don’t forget to pack extra batteries and memory cards, as the cold can drain battery life quicker than usual.
Understand Your Camera
Familiarity with your camera is crucial. Understand settings like ISO, aperture, and shutter speed. High altitudes and low temperatures can affect your camera’s performance, so knowing how to quickly adjust settings in the dark pre-dawn hours will be a benefit.
Physical and Mental Preparation
Photographing the sunrise from Kilimanjaro requires more than just technical skills; physical fitness and mental readiness are just as important. Start conditioning your body months ahead of your trek. Remember, you’ll be shooting in a low-oxygen environment after a strenuous climb.
Climbing Mount Kilimanjaro
Choosing the Right Route
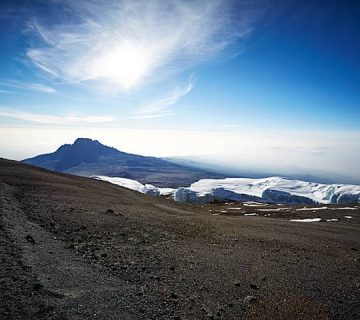
KCTE offers various routes to the summit, each providing unique vantage points for photographers. The Machame and Lemosho routes are scenic and ideal for acclimatization, increasing your chances of a successful summit—and a glorious sunrise photo.
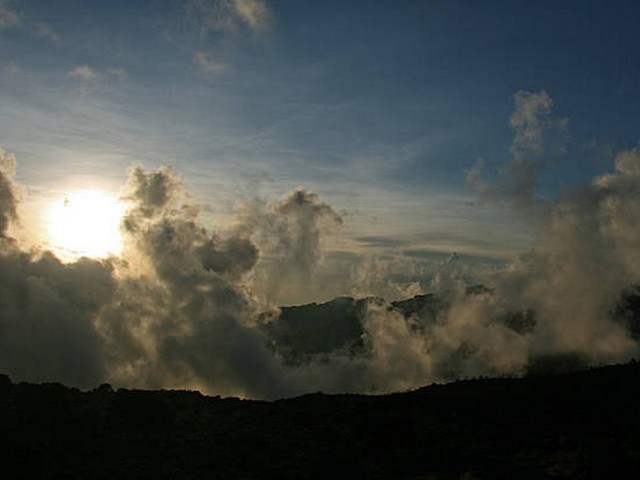
The Summit Night
Summit night is challenging. You begin your ascent to Uhuru Peak around midnight, trekking through the dark and cold. Energy conservation is key. Keep your camera accessible but protected from the elements. As you approach the summit, prepare your camera settings for the anticipated sunrise.
Capturing the Sunrise
Setting Up
Once at the summit, find a stable spot to set up your tripod. A wind-sheltered location is ideal to avoid camera shake. Frame your shot in advance and do some test shots to check your exposure and focus.
Using the Right Settings
Shooting in manual mode gives you full control. Set a high ISO as it’s still dark, and adjust accordingly as the light increases. A small aperture (high f-stop number) will keep the foreground and background sharp. Experiment with different shutter speeds to capture the varying intensities of light.
Creative Techniques
Try various techniques like HDR (High Dynamic Range) to manage the challenging light conditions. Bracketing your exposures will allow you to merge them in post-processing for the perfect shot. Time-lapses can also be a mesmerizing way to document the shifting colors and creeping light.
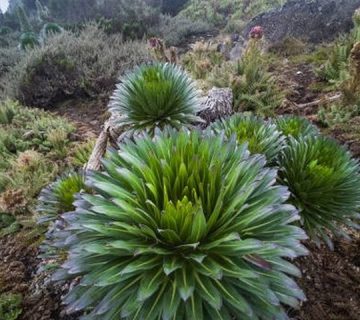
Respect the Mountain
Always remember that you are in a delicate ecosystem. Follow all guidelines, keep to the paths, and pack out everything you bring in. Capturing the summit is important, but preserving its beauty is even more so.
After the Descent: Post-Processing Tips
Editing Your Photos
Post-processing plays a significant role in landscape photography. Adjust the exposure, highlights, and shadows to bring out the details. Enhancing colors and correcting the white balance can help recapture the scene as your eyes saw it. Tools like Lightroom or Photoshop are invaluable in this stage.
Sharing Your Story
Once you’ve processed your photos, sharing them can inspire others. Write about your journey and the challenges you faced. Your unique perspective adds depth to your images, making them even more compelling.
Summary and Call to Action
Photographing the sunrise from the summit of Kilimanjaro is an endeavor that combines adventure, photography, and personal challenge. The journey up Kilimanjaro with KCTE not only promises spectacular photographic opportunities but also a safe and memorable trekking experience.
If you’re inspired to capture one of nature’s most awe-inspiring scenes, book your climbing adventure with the Kilimanjaro Centre for Trekking and Ecotourism (KCTE). Our expert guides, comprehensive support, and dedication to environmental stewardship ensure that your trek to the Roof of Africa is unforgettable.
Embark on this remarkable journey to not only chase the sunrise but also to discover your own resilience and forge lasting memories.
Frequently Asked Questions
Q: What is the best time of year to photograph the sunrise from Kilimanjaro?
A: The best times are during the dry seasons, from late June to October and from late December to early March. These periods provide clearer skies and more predictable weather conditions.
Q: How difficult is the climb to Kilimanjaro’s summit?
A: Climbing Kilimanjaro is a physically demanding endeavor that requires proper preparation. However, with the right training and support from experienced guides like those at KCTE, many individuals find it an achievable challenge.
Q: Do I need special permits to photograph on Kilimanjaro?
A: No special photography permits are required, but you must adhere to the park’s rules and regulations. Always be respectful of the natural environment and the local cultural norms.
Q: Can I rent photography equipment in Tanzania?
A: While some equipment rental options are available, it is recommended to bring your own gear that you are familiar with to ensure you get the best results.
Capture not just images, but the essence of adventure and achievement. Join us at KCTE, where your journey to the skies begins.