How To Create Time-lapse Videos Of Kilimanjaro
Welcome to the majestic world of Kilimanjaro!
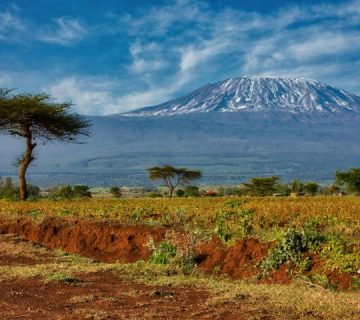
Standing as a beacon over the African plains, Mount Kilimanjaro is not just a mountain; it’s an epic story waiting to be told. At the Kilimanjaro Centre for Trekking and Ecotourism (KCTE), we understand that every trekker or visitor wants to capture something unique that echoes their personal experience. What better way to encapsulate the grandeur of your journey than through a stunning time-lapse video? This guide is designed to help you capture Kilimanjaro in motion, transforming hours of natural splendor into a captivating few minutes of escalating beauty. So, pack your gear and prepare to capture Kilimanjaro like never before!
Why Create a Time-lapse Video of Kilimanjaro?
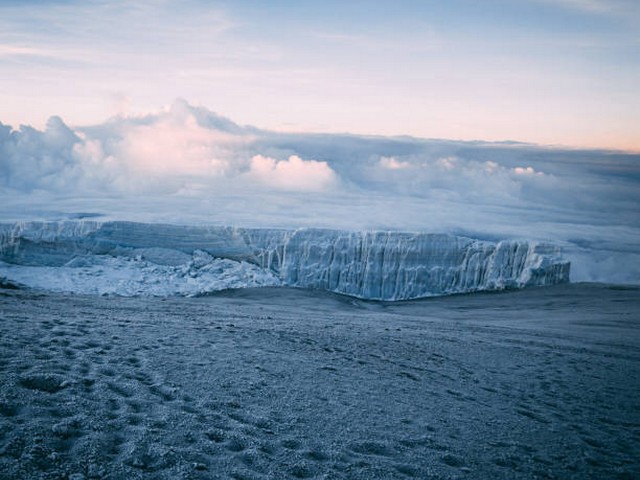
Time-lapse photography is a technique that offers a unique perspective on the world, turning slow-moving processes into a beautiful, fluid event you can appreciate in a matter of moments. Watching the clouds sweep over Kilimanjaro’s summit or the sun rising over its vast moorlands can be an exhilarating sight when shown through time-lapse. It’s not just about keeping memories; it’s about experiencing the raw, natural pace of this magnificent mountain in a way that resonates with the rhythm of nature itself.
Getting Started: What You’ll Need
Essential Gear
- A reliable camera: DSLR or Mirrorless with intervalometer (or a smartphone with a time-lapse app)
- Tripod: Crucial for stability over long shooting intervals.
- Extra batteries and memory cards: Conditions can be tough and power outlets are rare in the wilderness!
- Weather protection for your gear: Sudden weather changes are your biggest challenge.
Planning Your Shoot
- Research: Understand the sunrise and sunset times, weather patterns, and potential shooting locations.
- Scout locations early: Look for safe, stable ground with compelling compositions and unobstructed views.
Step-by-Step Guide to Shooting Time-lapse on Kilimanjaro
Creating a time-lapse involves patience and precision. Here’s how you can do it:
1. Set Up Your Equipment
Assemble your tripod and mount your camera securely. Ensure it’s level and stable.
2. Configure Your Camera
- Mode: Manual mode is preferable. It gives you consistent exposure throughout the sequence.
- Aperture: A mid-range f-stop (f/8 to f/16) offers a good depth of field while maintaining image sharpness.
- ISO: Keep it low to avoid noise.
- Shutter Speed: Varies depending on the time of day and light. Typically, a slower shutter will smooth out motion.
- Interval: Decide how often the camera should take a picture. A shorter interval (every 3-5 seconds) is ideal for capturing fast-moving clouds or sunrise.
3. Let the Camera Run
Start your intervalometer and let the camera do its job. Avoid touching the camera during this period to prevent shakes.
4. Post-Processing
After capturing your images, use video editing software to compile them into a time-lapse video. Tools like Adobe Premiere Pro or even free software like DaVinci Resolve can help you adjust exposure, color grade, and render your final video.
Best Locations on Kilimanjaro for Time-lapse Photography
- Uhuru Peak: The highest point in Africa is perfect for capturing sunrise or cloud movements.
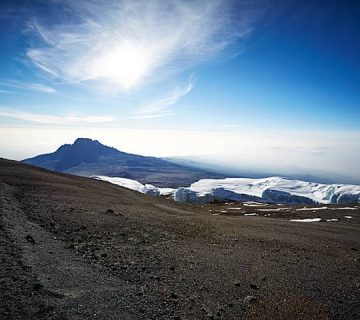
- Shira Plateau: Offers expansive views of the Kibo peak and wide-open skies.
- Barranco Wall: Great for capturing the dramatic morning light and the hustle of climbers starting their day.
Safety Tips While Shooting
- Always stay aware of your surroundings.
- Keep your equipment secure.
- Plan your descent in daylight hours, especially if you have been capturing a sunset.
How Can KCTE Help You Achieve This?
At Kilimanjaro Centre for Trekking and Ecotourism, we’re not just about guiding you to the top; we are passionate about helping you capture the essence of Kilimanjaro. Our guides are trained to assist photographers in identifying the best spots and times for capturing these stunning time-lapse videos. Plus, we prioritize your safety and comfort throughout the journey.
Ready to embark on this breathtaking adventure? Book your Kilimanjaro climb with KCTE today and bring back not just memories, but spectacular cinematic records of the highest peak in Africa.
Summary
Creating a time-lapse video of Kilimanjaro is an enriching way to document and share your adventure. It brings out the soul of the mountain, showcasing the slow dance of clouds and celestial bodies around its summit. With the right equipment, a bit of planning, and a dash of patience, you’re set to capture one of nature’s grandest displays.
FAQ
Q: What time of the year is best for time-lapse photography on Kilimanjaro?
A: The best times are during the dry seasons, from late June to October and from late December to early March, when clearer skies can provide more predictable weather patterns.
Q: Can I rent photography equipment from KCTE?
A: Yes, we offer rental services for various photography equipment. Contact us in advance to ensure availability.
Q: How physically demanding is it to carry photography equipment up Kilimanjaro?
A: It can be challenging due to the altitude and steep trails. We recommend training beforehand and packing as light as possible. Hiring a porter can also help alleviate this burden.
Embrace the challenge, capture the beauty, and tell the story of Kilimanjaro through your lens. Join us at KCTE for an unforgettable journey to the roof of Africa!